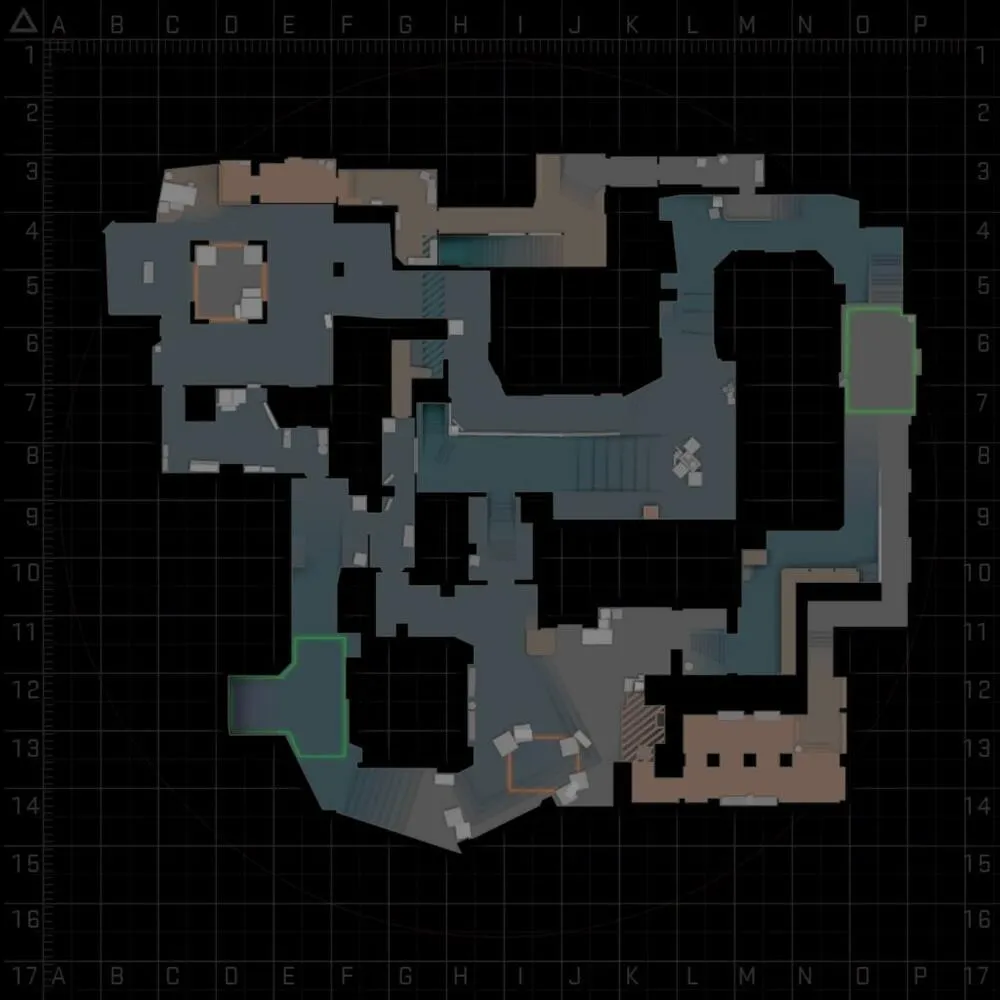
Mirage remains one of the most played maps on FACEIT and Premier, often rivaling Dust2 in popularity. Even as the Active Duty pool changes around it, the map remains central to CS2. There’s a practical reason to learn Mirage callouts. Players improve faster when their team uses clear map communication. Shared callout names reduce confusion during rounds, help teammates react more quickly, and make each match more predictable. This gives the team a better chance of winning.
How Callouts Work on Mirage
A callout is a short name for a location on a CS2 map. During a round, players don’t need to describe an entire position. A single accepted name communicates the location much faster. On Mirage, the main areas are A Site, Mid, and B Site. These are universal callouts because they refer to the largest sections of the map.
Mirage requires precise callouts because Mid affects both bombsites. Ts can use Mid for A and B splits, while CTs use Mid control for rotations and early information. The map also features higher and lower positions, including Palace, Balcony, Window, Catwalk, and Under Balcony. Local callouts identify specific spots within larger areas, such as Sandwich, Sneaky, and Boost Connector.
Also known as:
– TV Room
– Back Apps
Also known as:
– Underpass
Also known as:
– B Apps
Also known as:
– Car
Also known as:
– Kitchen
Also known as:
– Fridge
Also known as:
– Trash
Also known as:
– Top Box
Also known as:
– Sniper’s Nest
Also known as:
– A Ramp
– Pit
Also known as:
– Forest
Also known as:
– Apex
– Close
Also known as:
– Rat Hole
Also known as:
– Mid Ramp
Also known as:
– Catwalk
A Site Callouts
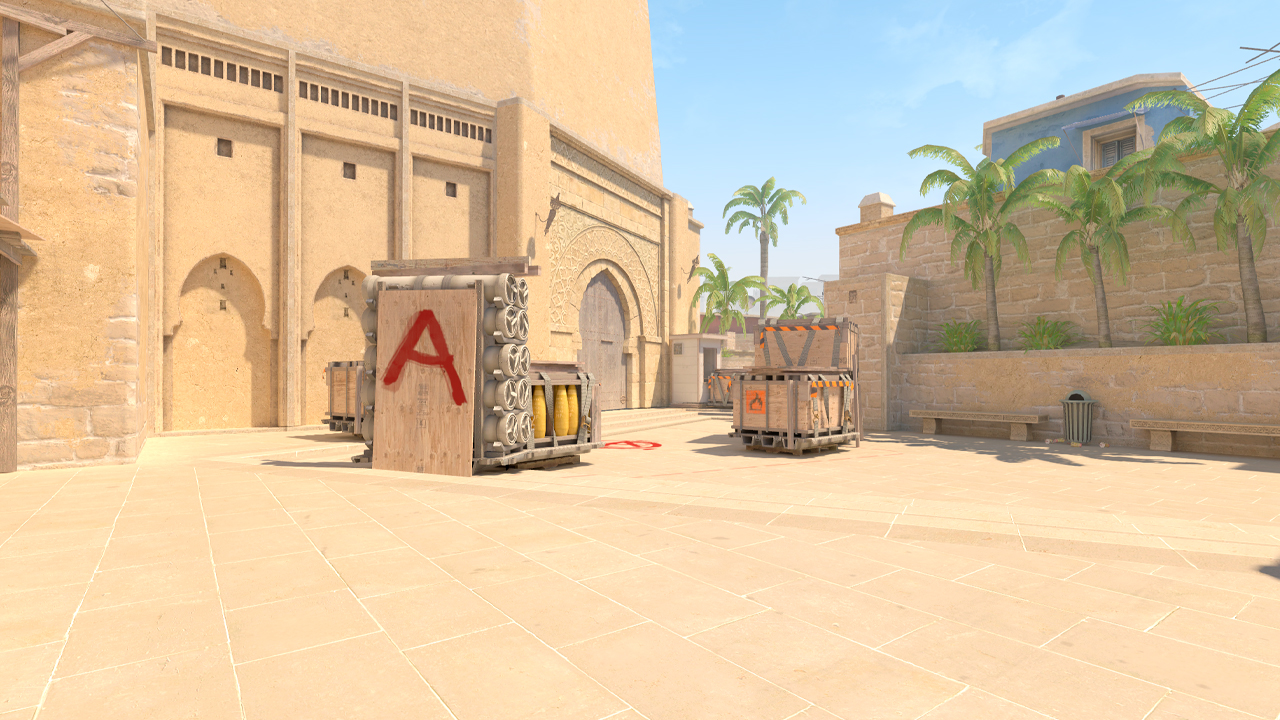
A Site is very open, which makes it harder to control for both T and CT players. Exact callouts help players control the situation during A hits, plants, and retakes.
On A Site
- A Site: The bombsite on the east side of the map where the bomb can be planted.
- Default: The standard A plant spot where the planter isn’t exposed to Jungle, Stairs, or A Main, but is visible from CT. A teammate should cover CT during this plant. Opposite Default works the other way. The planter is protected from CT but exposed to Jungle, A Main, and Stairs, so the team still needs cover.
- Triple: A strong CT-side position when Ts enter A Site. A player can fight toward Default and Tetris while using the boxes as cover. The main risk is a Molotov thrown under the position, which can force the player back toward CT.
- Ninja: A strong CT-side hiding spot since it’s often not checked fully. It’s usually better not to shoot the first opponent instantly. Waiting until Ts move deeper into the plant area can make the position stronger. From the T side, this spot should always be checked.
- Firebox: A good CT-side spot for letting Ts enter the plant area before attacking them unexpectedly. The position can be shot from Stairs, so it should be played carefully. It’s also often cleared with a Molotov, so having a smoke can help put the fire out. From the T side, this spot should always be checked.
- Tetris: Often used by Ts when one player has already entered A Site, but the rest of the team hasn’t reached the plant area yet.
- Headshot: Used for the same position here. Headshot gets its name as only the player’s head is visible from CT. It’s a useful spot for watching CT, but it’s risky because the player can be exposed to Stairs and Jungle.
- Sandwich: The position between Stairs and Tetris. It’s checked often and can be difficult to play since the player can be seen from Stairs above and from the Tetris side.
- Stairs: Both sides can use Stairs. It’s useful for checking the plant area, Palace, and A Main. The risk is that a player can come through Connector and may not be noticed in time.
- Balcony: The Palace exit above A Site. A CT player can wait for Ts to come out onto the site, usually while watching Palace. This position is sometimes not checked fully during the A entry.
- Under Balcony: A hiding area under Balcony that can be used to fight players moving through A Site, Tetris, Stairs side, or Jungle side. The two main risks are wallbangs and Molotovs.
- Bench: Useful for watching Ts near Pit and A Main from the CT side. Standing on Bench can expose more of the enemy model and help secure an opening kill with a sniper rifle.
- Ticket: A common CT-side position when Ts enter A Site. It’s also useful with a sniper for watching Headshot and catching players who move onto the plant area.
Around A Site CT
- Jungle: A good position for watching Palace and controlling Ts when they enter A Site. It can help a CT player get at least one kill and then fall back toward CT Spawn. The main danger is Window. Ts can boost into Window and punish the player holding Jungle.
- CT Spawn: The area where Counter-Terrorists spawn before rotating to A or B.
- CT: Useful for controlling A Site, Palace, and the CT Spawn path. The risk is that the player can be pressured from several angles at the same time.
- Missiles: The corner near CT with the missile stack. It can be played with a shotgun since Ts often send at least one player toward CT during an A hit. This can give the CT player a chance for an unexpected kill.
- Connector: The link between Mid and A Site. It’s useful for watching A Site and for watching Top Mid with a sniper. The player in Connector must be careful since Short has a clear angle onto the position.
- Vent: The breakable opening between CT Spawn and Window. It’s usually broken with a knife at the start of the round. Moving through Vent is slow, so players should learn the proper jump to pass through it faster. This can create an unexpected timing against the player controlling the area from Jungle.
Palace and A Ramp T
- A Main: A T-side route that leads toward A Site. A T player often holds this area to look for an opening kill before the A hit. The danger is that the player can be seen from Bench and Stairs, while CTs can sometimes push Pit with a shotgun or SMG.
- T Roof: The raised position outside A Main on the T Spawn side.
- Palace: Often used by Ts to enter A Site from a second angle together with A Main. From Palace, players can also see Jungle and Stairs. After the bomb is planted, a T player can stay in Palace to punish a CT player during the defuse.
B Site Callouts
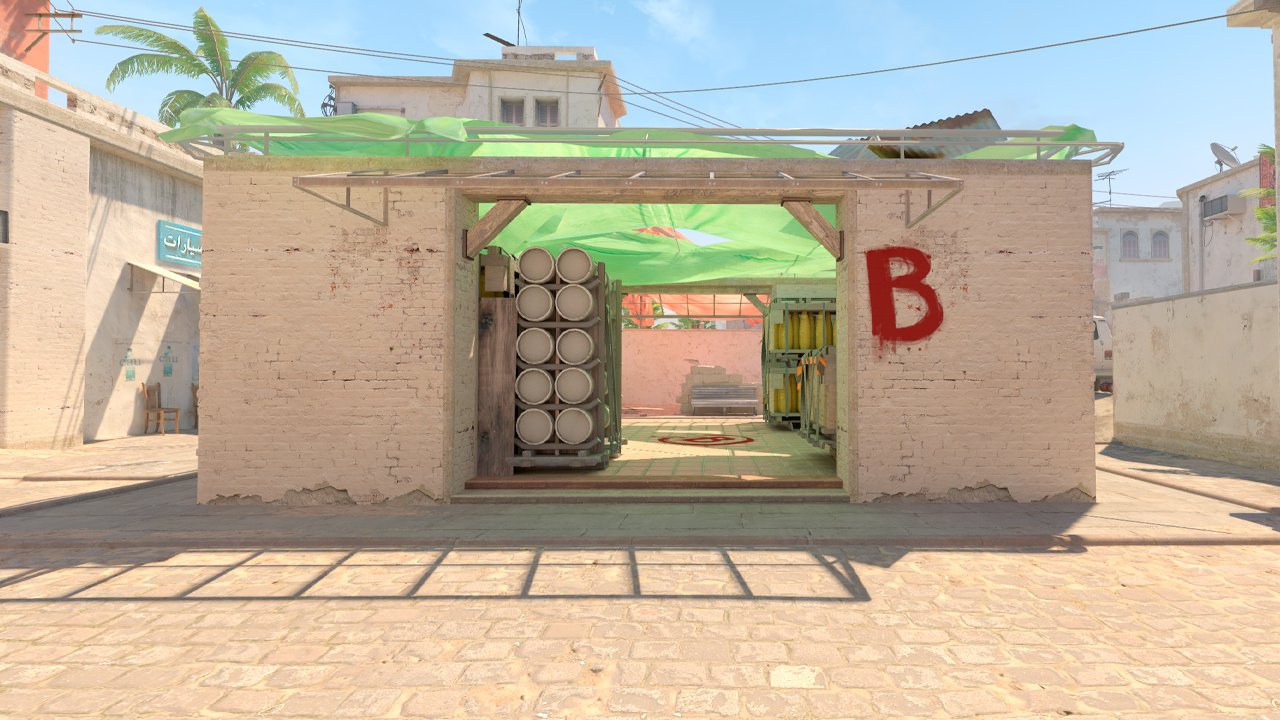
B Site is more closed than A Site, with many spots where an opponent can hide or reposition quickly. Exact callouts are especially important here, as fights can move fast during B hits, plants, and retakes.
On B Site
- B Site: The bombsite on the west side of the map, where the bomb can be planted.
- E-box: Often used by Ts to control the CT exits from Market and Short. This spot should always be checked during a B retake or B site clear.
- Bench: A player on Bench can take fights toward Balcony, Short, and the Market exit. The risk is that the player can be pressured from several sides and must react quickly.
- Jail: A spot that should always be checked since both T and CT players can hide there. It’s often cleared with a Molotov.
- Backsite: A team-context call. From the T side, it is closer to Market. From the CT side, it is closer to Apartments. It can be used by both sides to move around the site and try to isolate an opponent.
- Trash: A position near the Market exit. It’s useful for watching Car, although the player standing there can be killed from Short.
- Balcony: The standard T-side exit onto B Site. A T player often runs from Balcony toward Car to watch CTs through Window. From the T side, Car should also be checked when the team enters the site.
- Default: The standard bomb planting spot on B Site next to the large boxes.
Market and Window (CT)
- Market: The standard CT-side entrance into B Site. CTs also use this route when they try to retake the site. From the CT side, this area must be played carefully after the T side takes B, since a T player can sit near Window and control the CT entrance into Market.
- Sneaky: A spot that is often not checked fully by CTs. Ts need to position there carefully, as part of the model can be visible and the surprise effect can be lost.
B Apartments and Van (T)
- Van: A standard CT position for watching Apartments. A CT player can hold the Apartments exit from behind the van. A T player can also hide there after the bomb is planted and wait for a CT player to start defusing.
- Apartments: The standard T-side route into B Site. Ts can enter the site through Balcony or use the Window inside Apartments. This area becomes risky when several players stay there since it can be watched from Market Window or Car. It’s also often cleared with Molotovs and HE grenades. After the bomb is planted, Apartments can still be used by a T player waiting for the CT side to start the defuse.
- Kitchen: The deepest part of Apartments. A T player can hide there to watch CTs coming from Underpass or TV Room, so this spot should always be checked. The position can also be shot through from the B Site side.
- Door: The Market entrance nearest to B Site.
- B Window: The single Market window that looks out onto B Site.
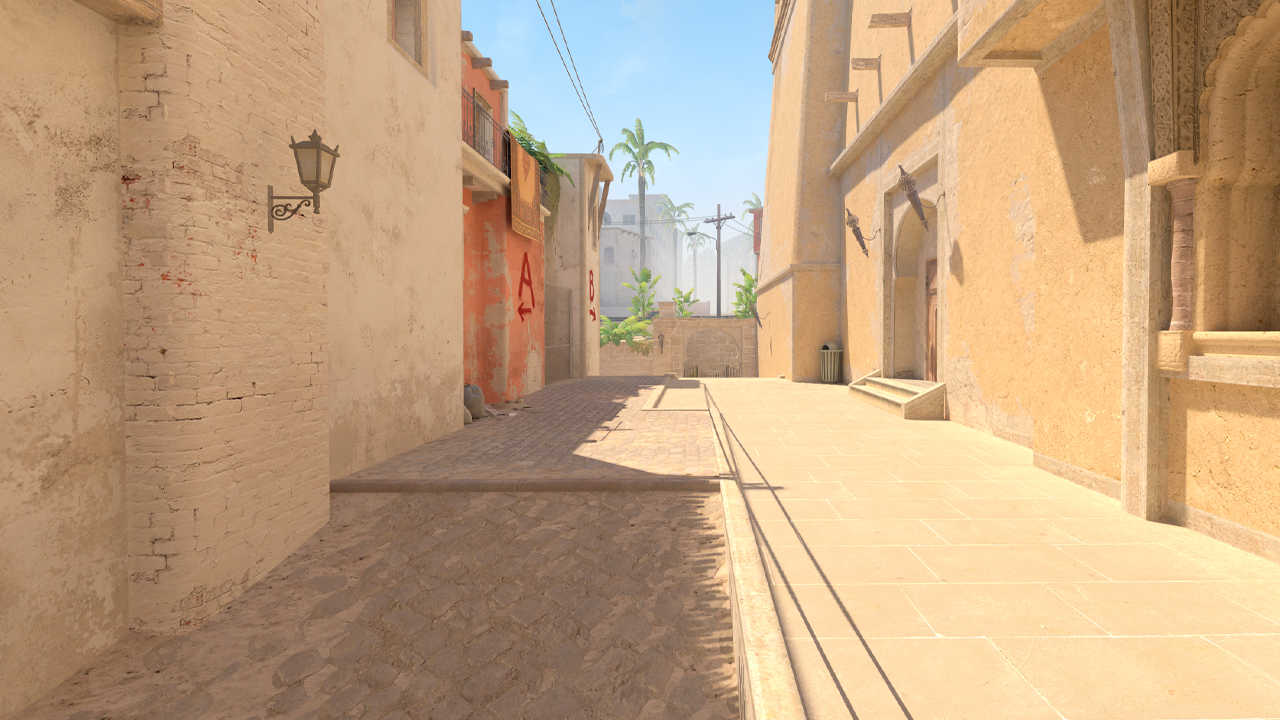
Mid Callouts
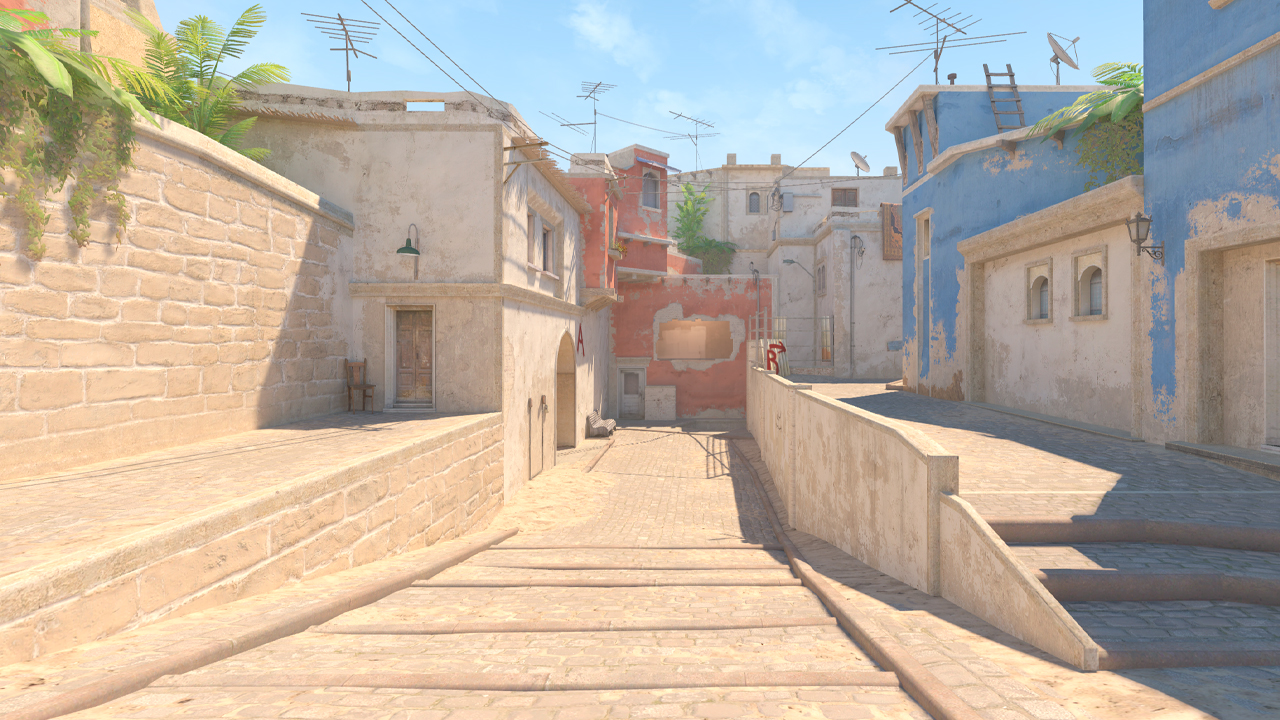
Mid is the most open part of Mirage and the main route for splits toward both A Site and B Site. Precise callouts are especially important here because opponents can appear from Window, Connector, Short, Under Window, or Underpass, and the situation can change very quickly.
Top Mid and entries
- Top Mid: The T-side entry into Mid and Short. This area is very open as Ts can be seen from Connector, Window, and Short when they move into Mid.
- Bench: Used to jump onto Boost and get into Window. It can also be used to watch Short, so the player on Short should always check this spot as it can be easy to miss.
- Under Window: Used when one player boosts another player into Window. The player inside Window should be careful as the Boost or Under Window position isn’t always visible from there.
- Underground: Used by Ts to enter Mid. CTs can also use it as a rotation route during retakes from A toward B. Ts should be careful early in the round as a CT player can drop from Window into Underground and try to get an opening kill.
- Mid Boxes: Ts use it when fighting Window or Short from Top Mid. This position can also be shot through from Window.
- Chair: Useful for watching Short. The player holding Chair should be careful as CTs can boost on Short boxes while the Chair player is double-scoped on Short and may not see the boosted player. It can also be used to wait for a CT player retaking B through Catwalk.
- Mid Close: Often used by CTs early in the round to fight Ts moving into Top Mid. The CT player can see more of the T player model, while Ts may only see the CT player’s head.
Sniper’s Nest and Window
- Window: CTs often use this position to watch Top Mid with a sniper and catch Ts entering Mid. Players can also reach Window with a boost. The T side often throws an early smoke into Window, which makes the opening kill harder for the CT player.
- Bricks: Used to move from Window toward Ladder. The jump from Window frame to Bricks takes practice because it can be easy to miss.
Catwalk and B Short
- Short: Ts can use it to move from Mid toward B Site. CTs can also use this route during a B retake. This path is narrow and can be shot through from the A side, so teams should plan a smoke before crossing. Players should move through this area quickly.
- Ladder: A position that can be used to surprise an opponent in Jungle or Window. The risk is that Jungle can also watch Ladder, so the player should check Jungle with a short strafe.
- Boost: Often used by CTs to get on top of the boxes and watch Chair or Mid Ramp. Ts can also boost there and look down at CTs around Boost.
- Get Right: The corner on Short where a CT player can hide while waiting for the T-side coming from Short. After the bomb is planted, a T player can also play there to watch CTs coming from Apartments or Short. The spot is called Get Right because GeT_RiGhT often played this position.
T Spawn Callouts
- TV: This area is known for the TV that Ts can break with a knife at the start of the round. Ts can also use this area when leaving Apartments and moving back toward Mid.
- Side Alley: The T-side area near the route toward Top Mid. Players should be careful here since someone can stand on the boxes near the upper part of T Apps and watch Top Mid. This spot can be easy to miss. CTs can also push this area when they want to pressure Ts holding near Top Box.
- Back Alley: The route between Apartments and TV.
- T Spawn: The starting area for the T side, with access toward Mid, A Ramp, and B Apartments.
Commonly Confused Callouts on Mirage
Some Mirage callouts can be confusing because a single location may have multiple names, and some names are used for different parts of the map. Market and Kitchen can both refer to the CT room near B Site, while Kitchen is also sometimes used for the area near B Apartments. Window and Sniper’s Nest usually describe the same Mid position. Under Balcony, Shadow, and Dark are all used for the area beneath Balcony on A Site. A Main, A Ramp, and Pit can all refer to the same T-side approach to A. Bench also requires context, as Mirage has Bench callouts on both A and B.
How to Learn Mirage Callouts
Mirage callouts are easier to learn in small groups rather than as one long list. Start by loading into Mirage alone, walking through one area, looking at each position, and saying the callout out loud. After learning A Site, play a few matches to see whether you are using the names correctly during real rounds. Then repeat the same method for Mid, B Site, and the rest of the map. Regional terminology also matters in mixed lobbies, as European and North American players may use different names for the same location.
FAQ
-
What are the most important Mirage callouts to learn first?
The first callouts players should learn are A Site, B Site, Mid, Palace, A Ramp, Apartments, Window, Connector, Short, and Market. These names cover the main routes, bombsites, and rotation points used in most Mirage rounds.
-
What's the best way to memorize Mirage callouts?
The best approach is to learn one area of Mirage at a time and then use those callouts in real matches. Start with A Site, then move on to Mid, B Site, and the rest of the map.
-
Are Mirage callouts the same in Premier mode?
Yes. Mirage callouts are the same in Premier mode. The only difference is that players in mixed lobbies may use different regional names for the same position.
-
What's the difference between Cat, Catwalk, B Short, and Cat Short?
Cat and Catwalk usually refer to the path from Mid toward B. B Short and Cat Short typically refer to the section closer to the B Site entrance.
-
Why are there two callouts named Window on Mirage?
One Window is the Mid position, also known as Sniper’s Nest. The other Window is inside Market and overlooks B Site.
-
Are Mirage callouts the same as in CS:GO?
Most Mirage callouts are the same as they were in CS:GO. While CS2 updated the map’s visuals, the main position names on Mirage have remained familiar to players.


![How to Show FPS in CS2: Commands and Binds [2026]](https://community.skin.club/wp-content/uploads/2023/09/Main-x-Name-33-1.jpg)
![Best CS2 Crosshair Codes & Pro Players Settings [2026]](https://community.skin.club/wp-content/uploads/2023/09/Main-x-Name-10.jpg.webp)